


Board and batten walls have become one of the most requested interior treatments in recent years - and it's easy to see why. The combination of vertical boards and narrow cover strips adds architectural weight to a plain wall, creates a sense of height, and works equally well in traditional, farmhouse, and contemporary interiors. Done right, it looks like something a home was built with rather than something added later.
What's less talked about is the painting phase, which is where most board and batten projects either come together cleanly or start to look like a DIY job. This guide covers what board and batten walls are, how to approach the installation decisions, and - in detail - how to get the paint finish right.
For larger projects or rooms where the finish quality really matters, the Pro Works interior painting team can handle the entire painting phase from primer through to final coat.
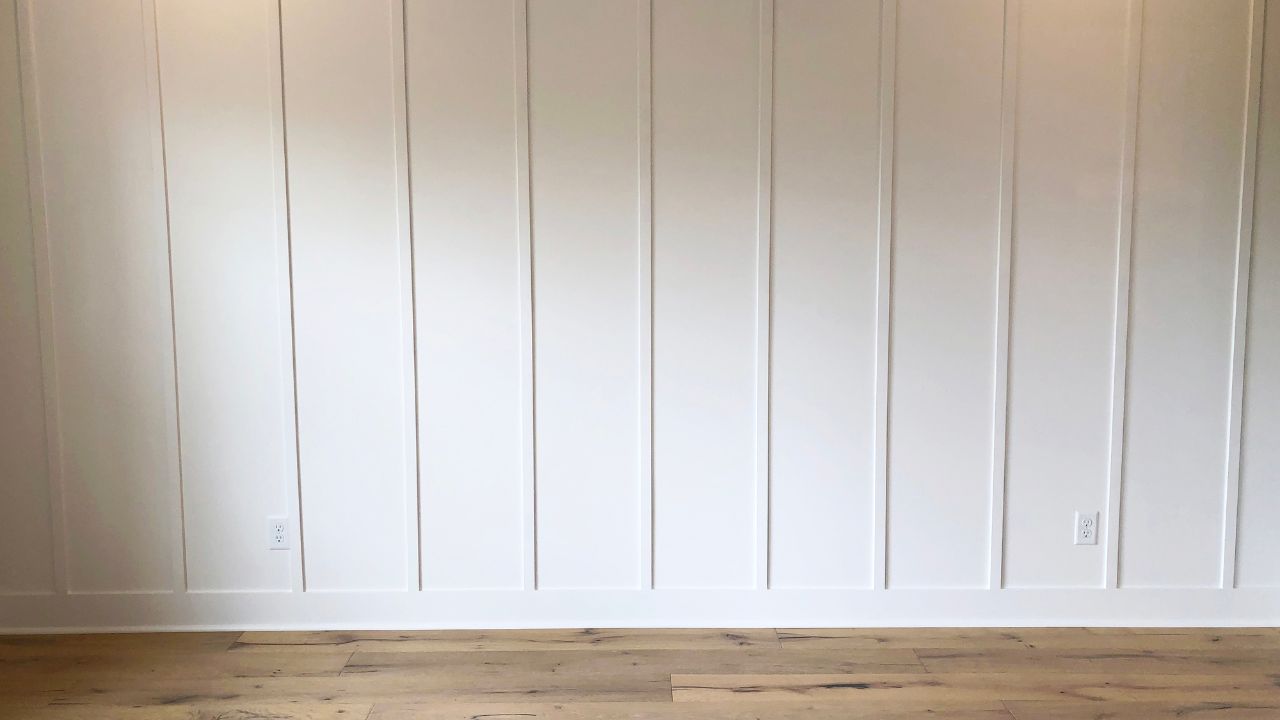
Board and batten is a wall treatment made up of two elements: wide vertical boards (the boards) and narrower strips (the battens) that cover the seams or are applied at regular intervals to create a panelled effect.
Originally a practical exterior cladding technique used to weatherproof timber-framed buildings, board and batten has been adapted extensively for interior use. In its modern interior form, it typically appears as a series of evenly spaced vertical strips mounted to a painted wall, often with a horizontal rail across the top to define the treatment's height.
The result reads as wainscoting with more presence - heavier and more architectural than a simple chair rail, but considerably simpler and less expensive to install than full raised-panel millwork.
There are two main approaches to achieving the look, and understanding the difference matters for both the installation and the painting process.
True board and batten involves attaching full-width boards to the wall to serve as the panel, then covering the seams between boards with narrower batten strips. This is the traditional method and creates a genuinely three-dimensional surface.
Faux board and batten - the more common interior approach - uses the existing drywall as the panel surface and applies only the batten strips at even intervals, often with a horizontal rail across the top. The wall between the battens is painted the same colour as the strips, which creates the same visual effect at a fraction of the material cost. For most interior accent walls and hallways, this is the practical and widely used method.
Both approaches are painted identically, but the faux method is faster, cheaper, and involves less weight on the wall.
.jpg)
A few decisions made before installation have a direct effect on how the finished result looks and how straightforward the painting becomes.
Height. There's no fixed rule, but a common approach for standard eight-foot ceilings is to run the treatment to around half the wall height - roughly four to five feet. Above this sits either painted wall or wallpaper. Running board and batten all the way to the ceiling creates a different look: more formal, more enveloping, and more demanding to execute cleanly.
Spacing. Battens are typically spaced between eight and twelve inches apart for a traditional look. Wider spacing reads as more contemporary and minimal. The spacing should be calculated per wall rather than applied uniformly across a room, so that the gaps are symmetrical on each wall and any obstacles like windows and doors are accounted for.
Materials. Pre-primed MDF is the most common choice for interior battens. It's smooth, takes paint beautifully, and is inexpensive. The trade-off is that MDF doesn't tolerate moisture well, so it's not suitable for bathrooms or laundry rooms without proper sealing. Pine is a good alternative in higher-moisture areas and gives a slightly more traditional character with visible grain, though it requires more prep before painting.
One of the most useful things to know about painting board and batten walls is the order of operations - and it's not quite what most people assume.
The most efficient approach is to paint the wall between the battens first, before the strips go up. This avoids the most tedious part of the painting job: carefully cutting in around dozens of narrow vertical strips with a brush. Once the battens are installed, you paint the strips themselves - and since they overlap the already-painted wall, the cut-in work becomes minimal.
Concretely, the sequence looks like this:
The quality of a painted board and batten wall comes down almost entirely to how well the prep work is done before the final coat goes on. This is the step that most DIY projects rush - and where the result starts to look amateur.
MDF requires the right primer. Raw MDF is highly porous and absorbs paint unevenly without a sealing coat first. An oil-based or shellac-based primer is the most reliable choice for raw MDF battens - it seals the surface thoroughly and prevents the raised grain and blotching that water-based primers can cause on this material. If you're using pre-primed MDF, the primer step is less critical but a light sand and a quick coat before the topcoat is still worthwhile.
Caulk every seam. This is the detail that separates a clean professional result from a DIY-looking one. A thin, continuous bead of paintable caulk applied along every edge where a batten meets the wall fills the gap that would otherwise show as a dark shadow line under paint. It's time-consuming, but skipping it is immediately visible in the finished result. Allow the caulk to dry fully before painting over it.
Fill and sand nail holes. Any brad nails or finish nails used in installation should be countersunk and filled with wood filler. Sand smooth once dry, feathering into the surrounding surface.
For board and batten walls, the finish of the paint matters more than it does on a standard flat wall, because the dimensional surface catches light differently and any sheen variation between the battens and the recessed wall will be visible.
The most practical approach is to use the same paint for both the wall surface and the battens - same colour, same sheen, same product. This makes the treatment read as architectural rather than two separate elements, and it eliminates any risk of sheen mismatch.
For finish level, eggshell or satin are the most popular choices for interior board and batten walls. Both offer more durability and cleanability than flat paint - useful on a surface with raised elements that attract contact - while remaining low enough in sheen that the light reflection doesn't become distracting. Semi-gloss is an option for a more traditional, formal look, particularly on trim-heavy applications, but it will emphasize any surface imperfections.
The geometry of board and batten walls creates a few technique considerations that don't apply to flat walls.
Use a brush for the edges of each batten and a small foam roller for the faces. The brush handles the inside edges where the batten meets the wall - the tightest spots to reach. The roller covers the flat face of the batten quickly and leaves a more consistent finish than a brush alone.
A paint sprayer is the fastest option for the batten strips, particularly on large rooms or floor-to-ceiling installations. A sprayer handles the edges, faces, and recessed wall surface in fewer passes and gives a smoother finish than brush and roller on narrow strips. The trade-off is the prep time required to mask everything thoroughly. You can read more about when spraying makes sense versus rolling in the Pro Works guide to spray painting vs roller painting.
Two coats is standard. One coat rarely provides full, even coverage on board and batten due to the varied surface angles. Allow the first coat to dry fully before assessing coverage, then apply the second coat.
Check in raking light before declaring it done. Hold a torch or work light at a low angle across the wall surface before the paint is fully dry. This reveals any missed spots, uneven coverage, or caulk lines that weren't feathered properly while there's still time to address them.
Skipping the level. Walls and floors are rarely truly square, and trusting the room geometry rather than a level produces battens that lean visibly once painted. Check plumb on every strip.
Inconsistent spacing. Calculate spacing per wall, not per room. Running the same measurement around corners without adjusting for wall width produces awkward gaps at the ends.
Rushing the filler and caulk. Paint applied over incompletely dried filler or caulk can crack and peel. Allow full dry time before sanding or painting over filled areas.
Using flat paint. Flat paint on raised elements gets marked quickly and is difficult to clean. Eggshell or satin holds up considerably better on a surface that sees contact.
Painting battens a different sheen than the wall. Even a subtle difference in finish level between the strips and the recessed wall is visible under natural light. Use the same product throughout.
.jpg)
A single accent wall in good condition is a manageable project for a patient DIYer with the right materials and sequence. For a full room, a hallway, or a staircase where the board and batten runs through multiple walls and complex angles, the time and precision required increases quickly.
The painting phase in particular benefits from professional execution on larger or more visible installations - particularly the caulking, the choice of primer for MDF, and achieving a consistent sheen across both the battens and the recessed wall sections. The Pro Works process covers how we approach interior mill-work projects from prep through to final coat, and you can browse completed interior projects to see what a properly finished result looks like.
Board and batten walls add something to a room that paint alone can't - genuine architectural weight and a sense that the space was designed with intention. The installation is within reach for most DIYers, but the painting phase is where the quality of the result is really decided.
Get the primer right, caulk every edge, work in the right sequence, and use a consistent paint product across the entire treatment. The difference between a result that looks custom and one that looks applied is almost always in these details.
When you're ready to get the finish done properly, reach out to the Pro Works team for a free quote.
What is the difference between board and batten and wainscoting?
Wainscoting is a broad term for any lower wall treatment, which includes board and batten as one style. Traditional wainscoting typically uses raised panels with framing rails, while board and batten is a simpler treatment using vertical strips at even intervals. Board and batten tends to be faster to install, less expensive, and works well in both traditional and contemporary interiors.
What paint finish is best for board and batten walls?
Eggshell or satin are the most practical choices for interior board and batten. Both offer more durability and cleanability than flat paint, which matters on a surface with raised elements that see contact. Using the same finish level on both the battens and the recessed wall avoids sheen variation under natural light.
Should I paint before or after installing the battens?
The most efficient sequence is to paint the wall surface before the battens go up, then caulk, fill nail holes, and apply the final coat over everything once the strips are installed. This avoids cutting in around every batten edge and produces a cleaner result with less effort.
Can I use MDF for board and batten walls?
Yes - pre-primed MDF is the most common material for interior battens. It's smooth, affordable, and takes paint well. The main limitation is moisture: MDF swells and degrades when exposed to humidity, so it's not suitable for bathrooms or laundry rooms without proper sealing.
Do the battens and the wall need to be the same colour?
Not necessarily, but painting them the same colour produces the cleanest, most architectural result. A single colour across the whole treatment makes the wall read as a unified element. Two-tone approaches - a darker colour below the rail and lighter above, or contrasting battens against the wall - can work but require more precise execution to avoid looking busy.